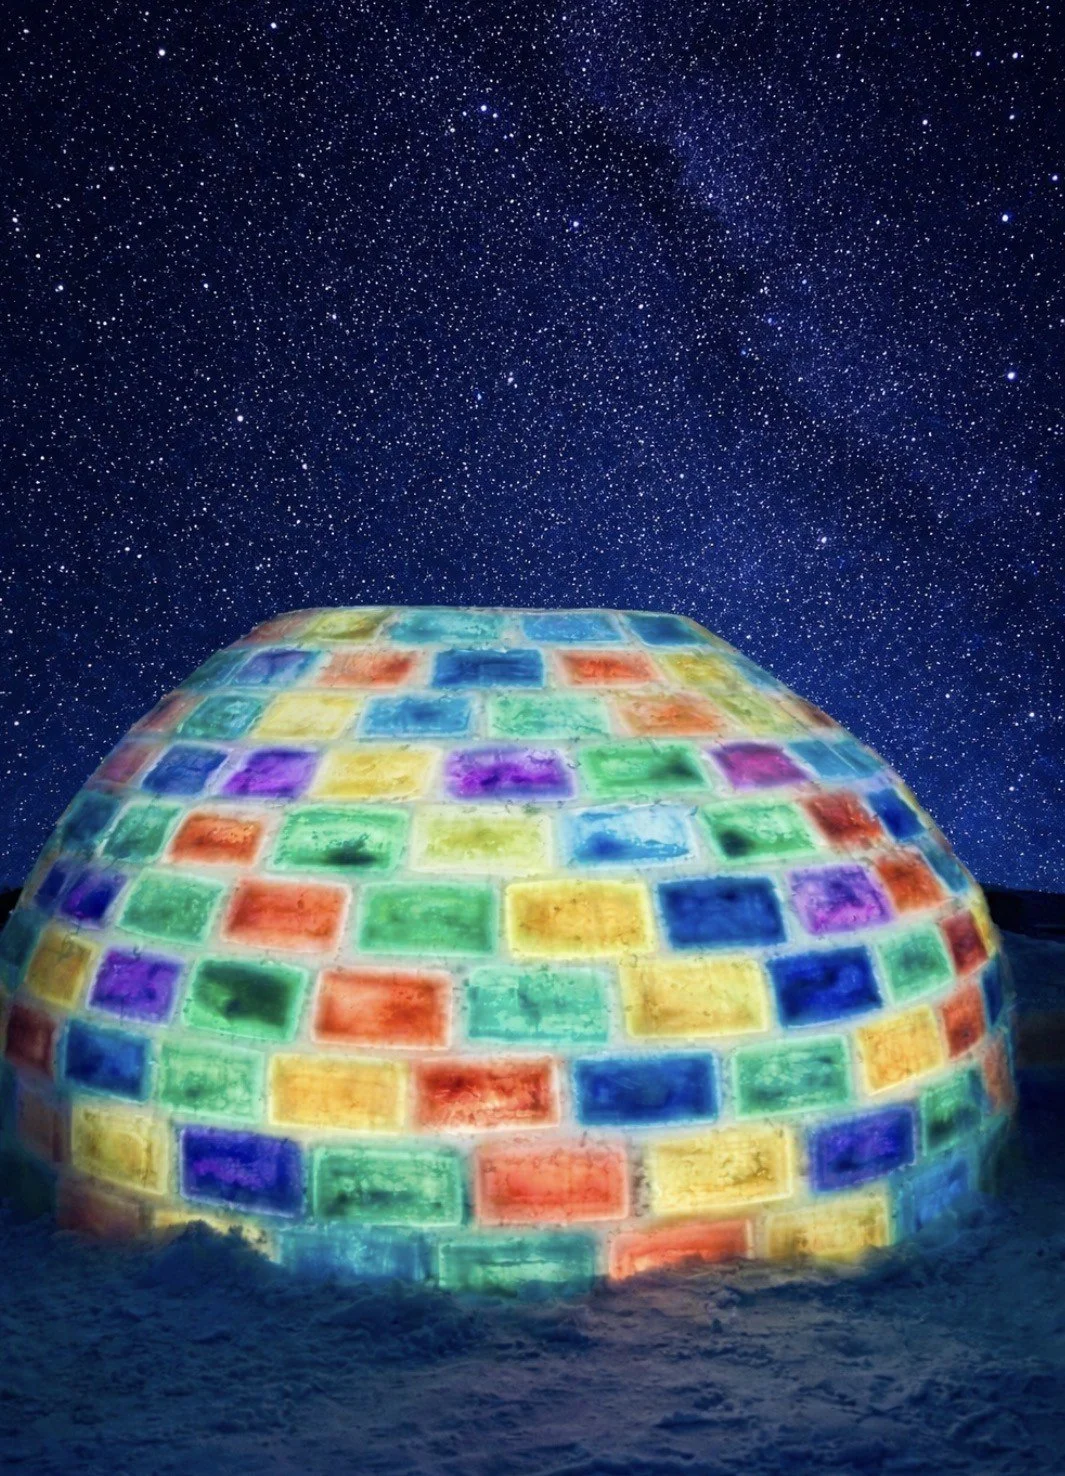
How to Build a Rainbow Igloo: Step By Step Directions and Tips
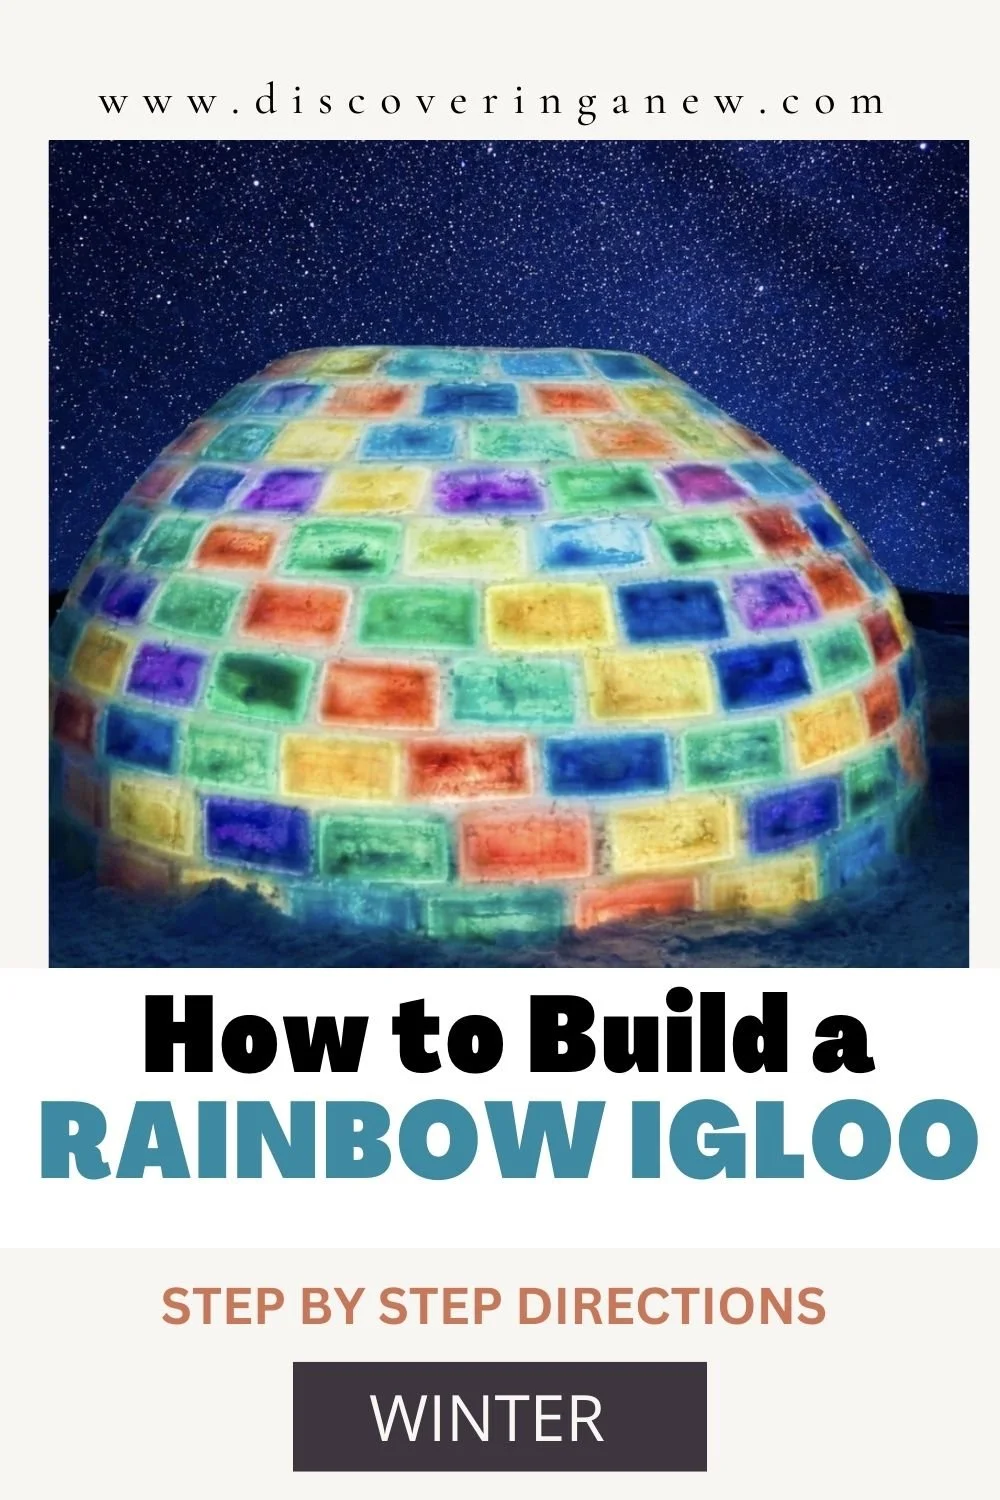
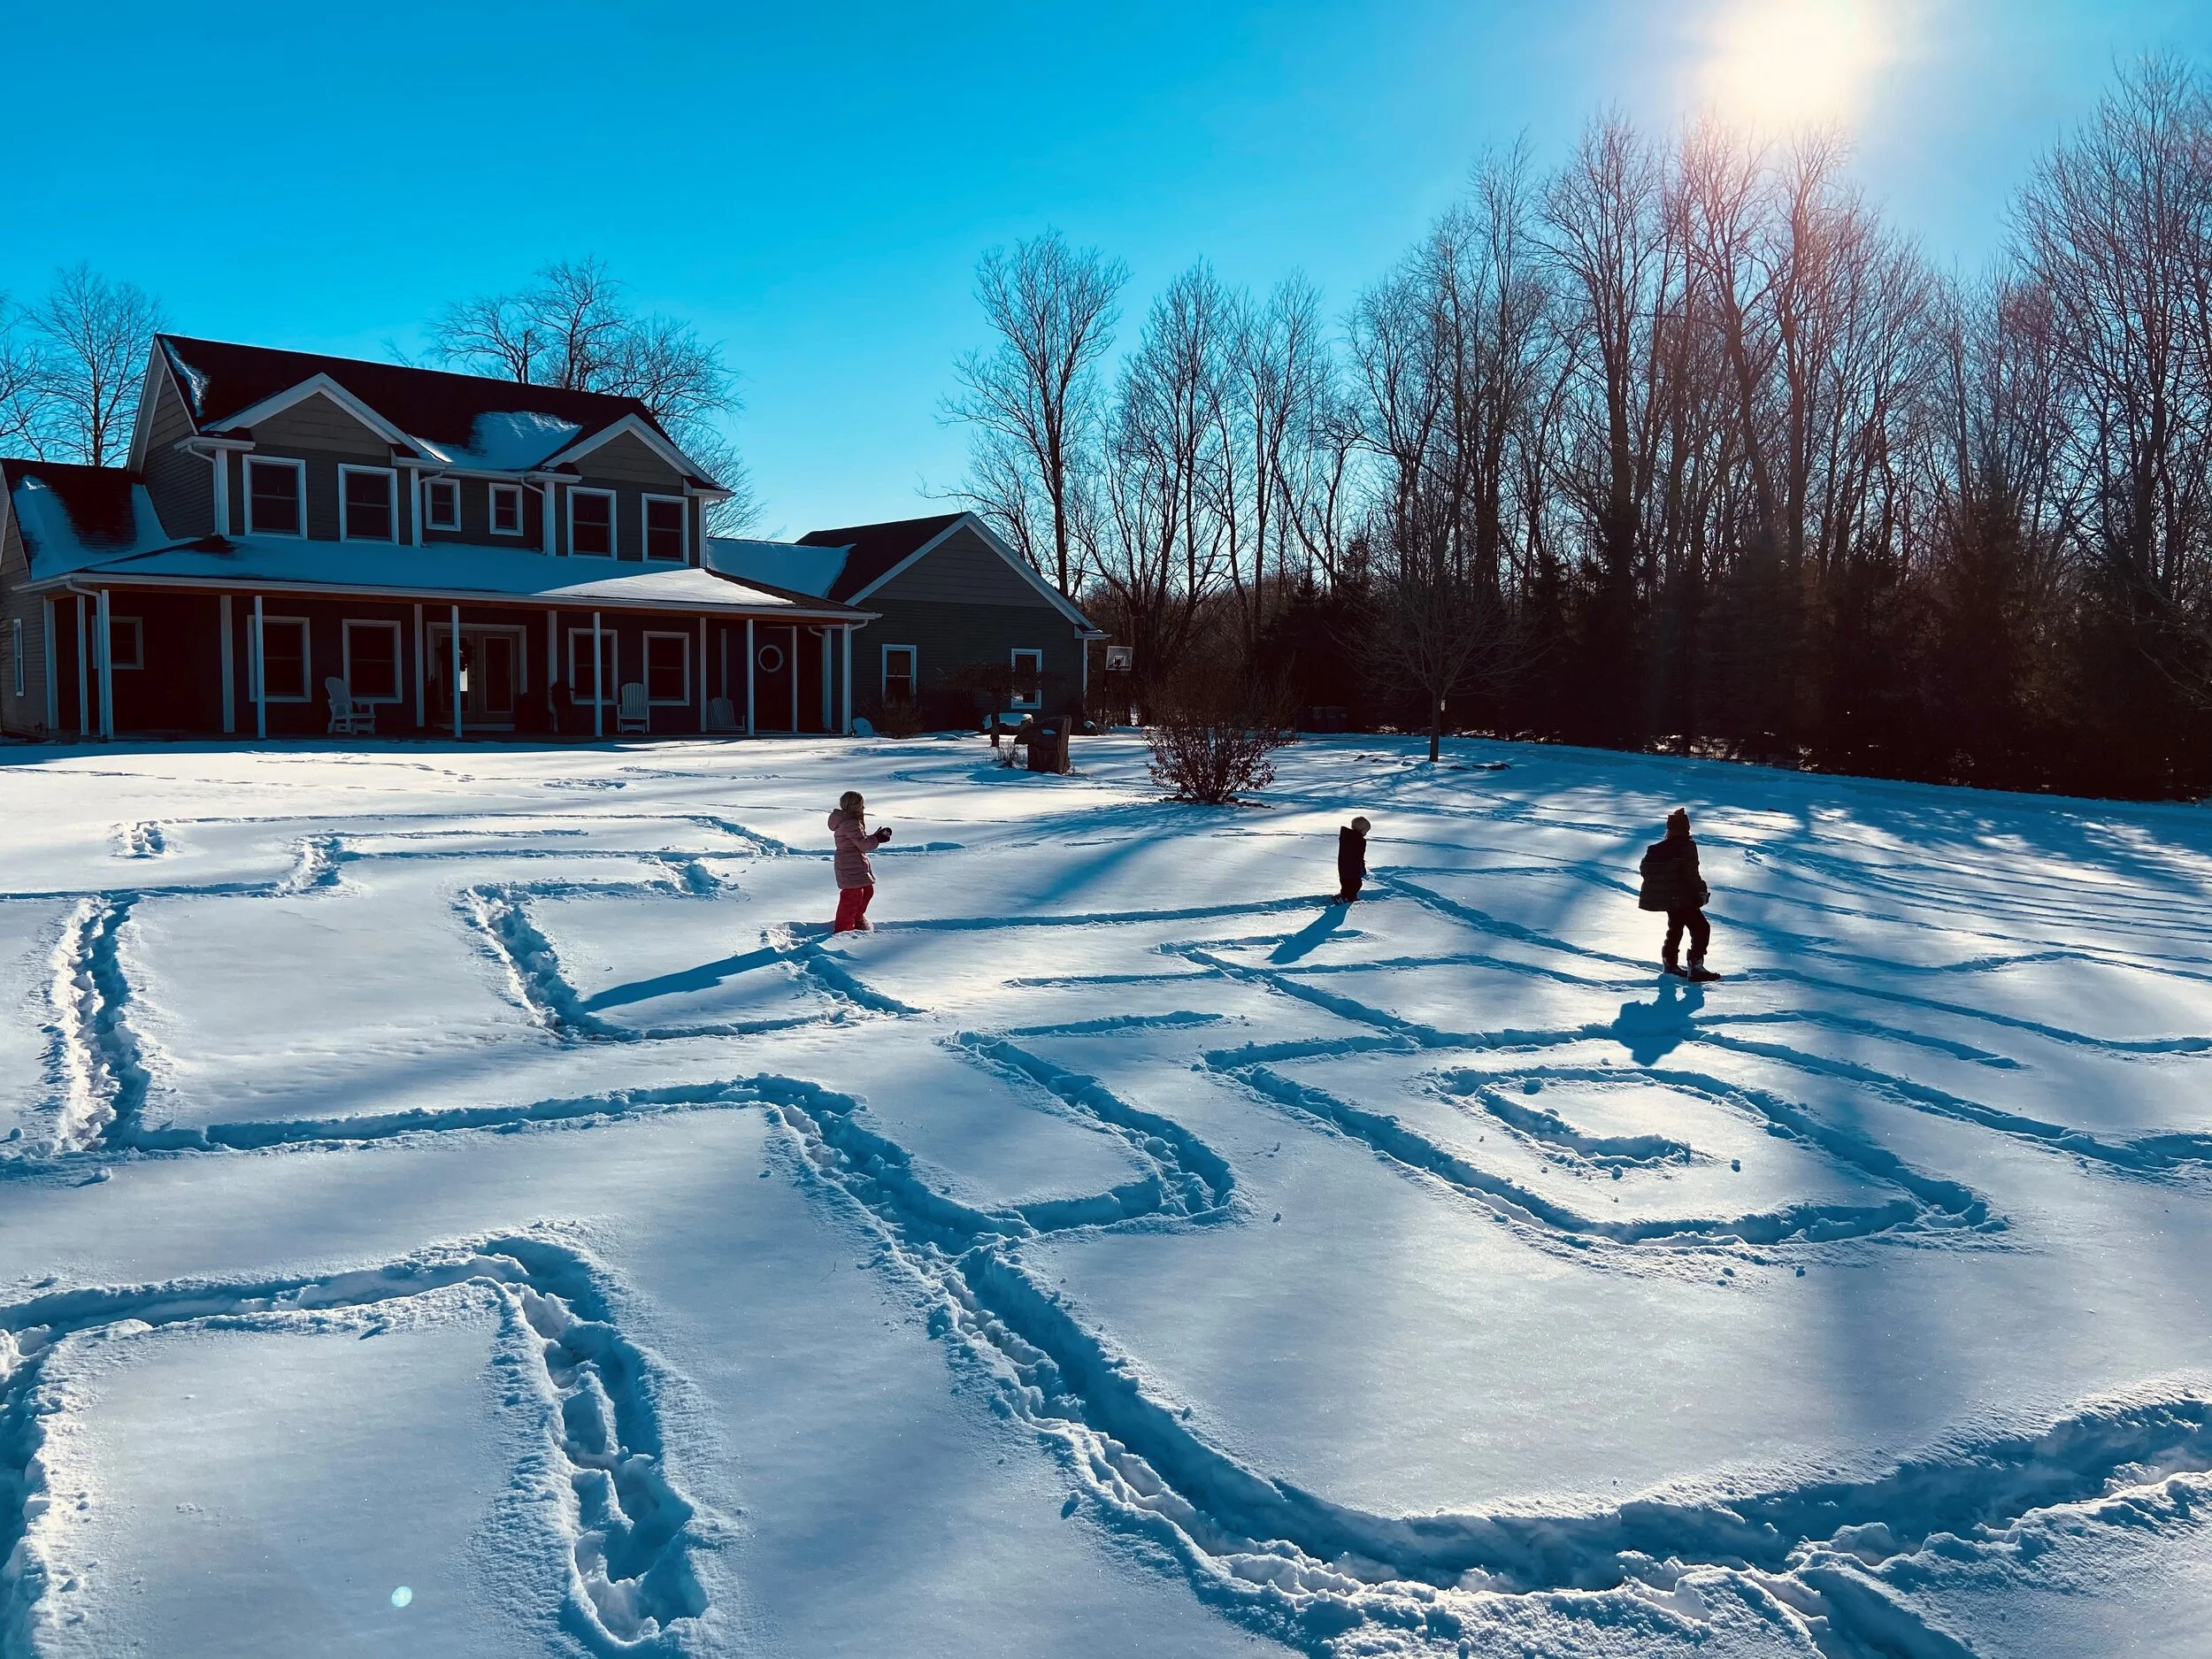
Are you trying to add a little fun and color to your winter days by creating a colorful snow igloo? Building one is a simple way to get kids outside, spark creativity, and turn an ordinary snowy day into a magical winter memory. Before starting, here are some great tips we scoured from individuals and families who love winter play—so your rainbow igloo stays sturdy, bright, and fun for everyone.
I only recommend products I would use myself and all opinions expressed here are our own. This post may contain affiliate links that add no additional cost to you, I may earn a small commission to help offset the cost of my blog.
Choose Right Conditions and Location: Best Time to Build Is Freezing Cold & Cloudy
Purchase Supplies
Pre planning is key. Build when temps stay below freezing for an extended length of time and out of direct sun so your colored igloo lasts longer.
Decide how large of base for igloo
Materials Needed for a Colored Snow Igloo
Snow – Packable snow works best (slightly wet, not powdery to make a snow slush)
Food Coloring or Gel Coloring (bright colors show up best)
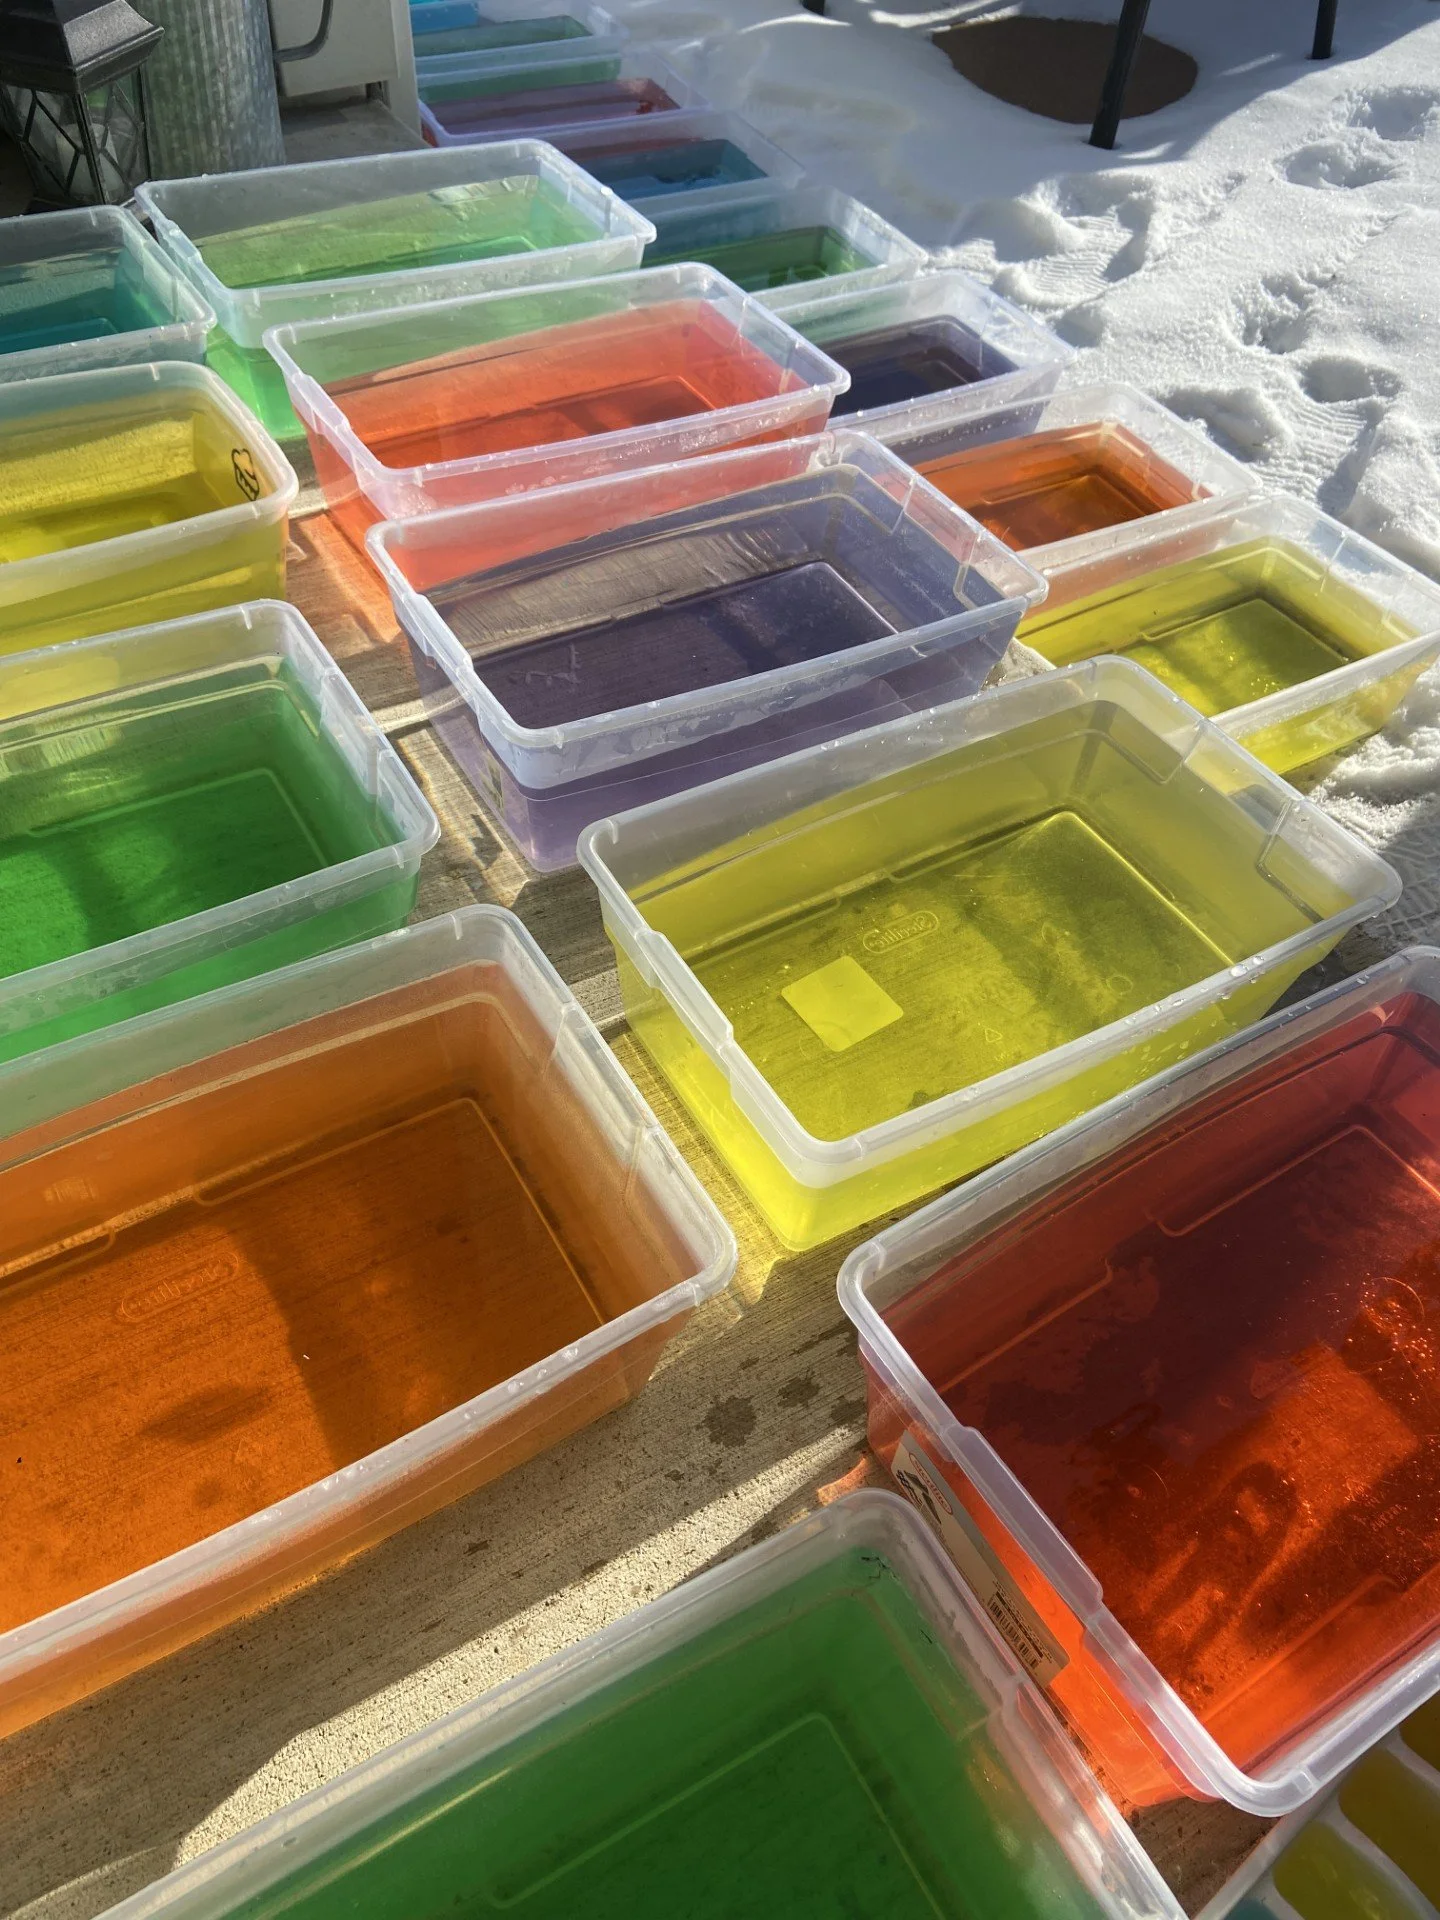
Plastic watering can- premix the colors before placing in the mold containers so the colors don’t settle
5 Galloon Bucket for Slush Water (mortar to connect blocks)
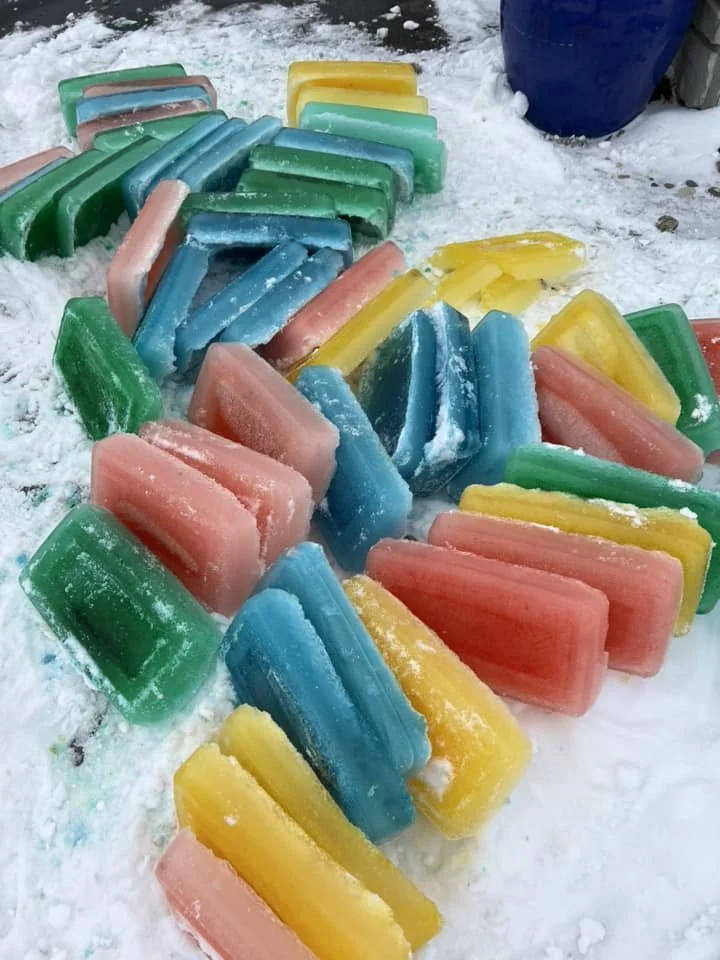
Aluminum Pans or Plastic Bins– The more you have the better to make snow blocks
Small Shovel – For packing and moving snow
Waterproof Gloves or Mittens – Your hands will get wet and cold, possibly dyed.
Make sure to have the Best Snow Gear possible.
Tips for Making Colored Snow Igloo
Check weather forecast: Conditions need to be cold for an extended length of time- freezing temps. This project takes days or even a week to accomplish.
Size matters Expect to make 200-300 bricks for small igloo- larger one upward of 1000 bricks. Inside circle 5-6 ft would be a smaller igloo with 10ft being large. Depending on your ambition and age of kids. ( Younger children will often lose interest. )This is definitely a huge family project undertaking.
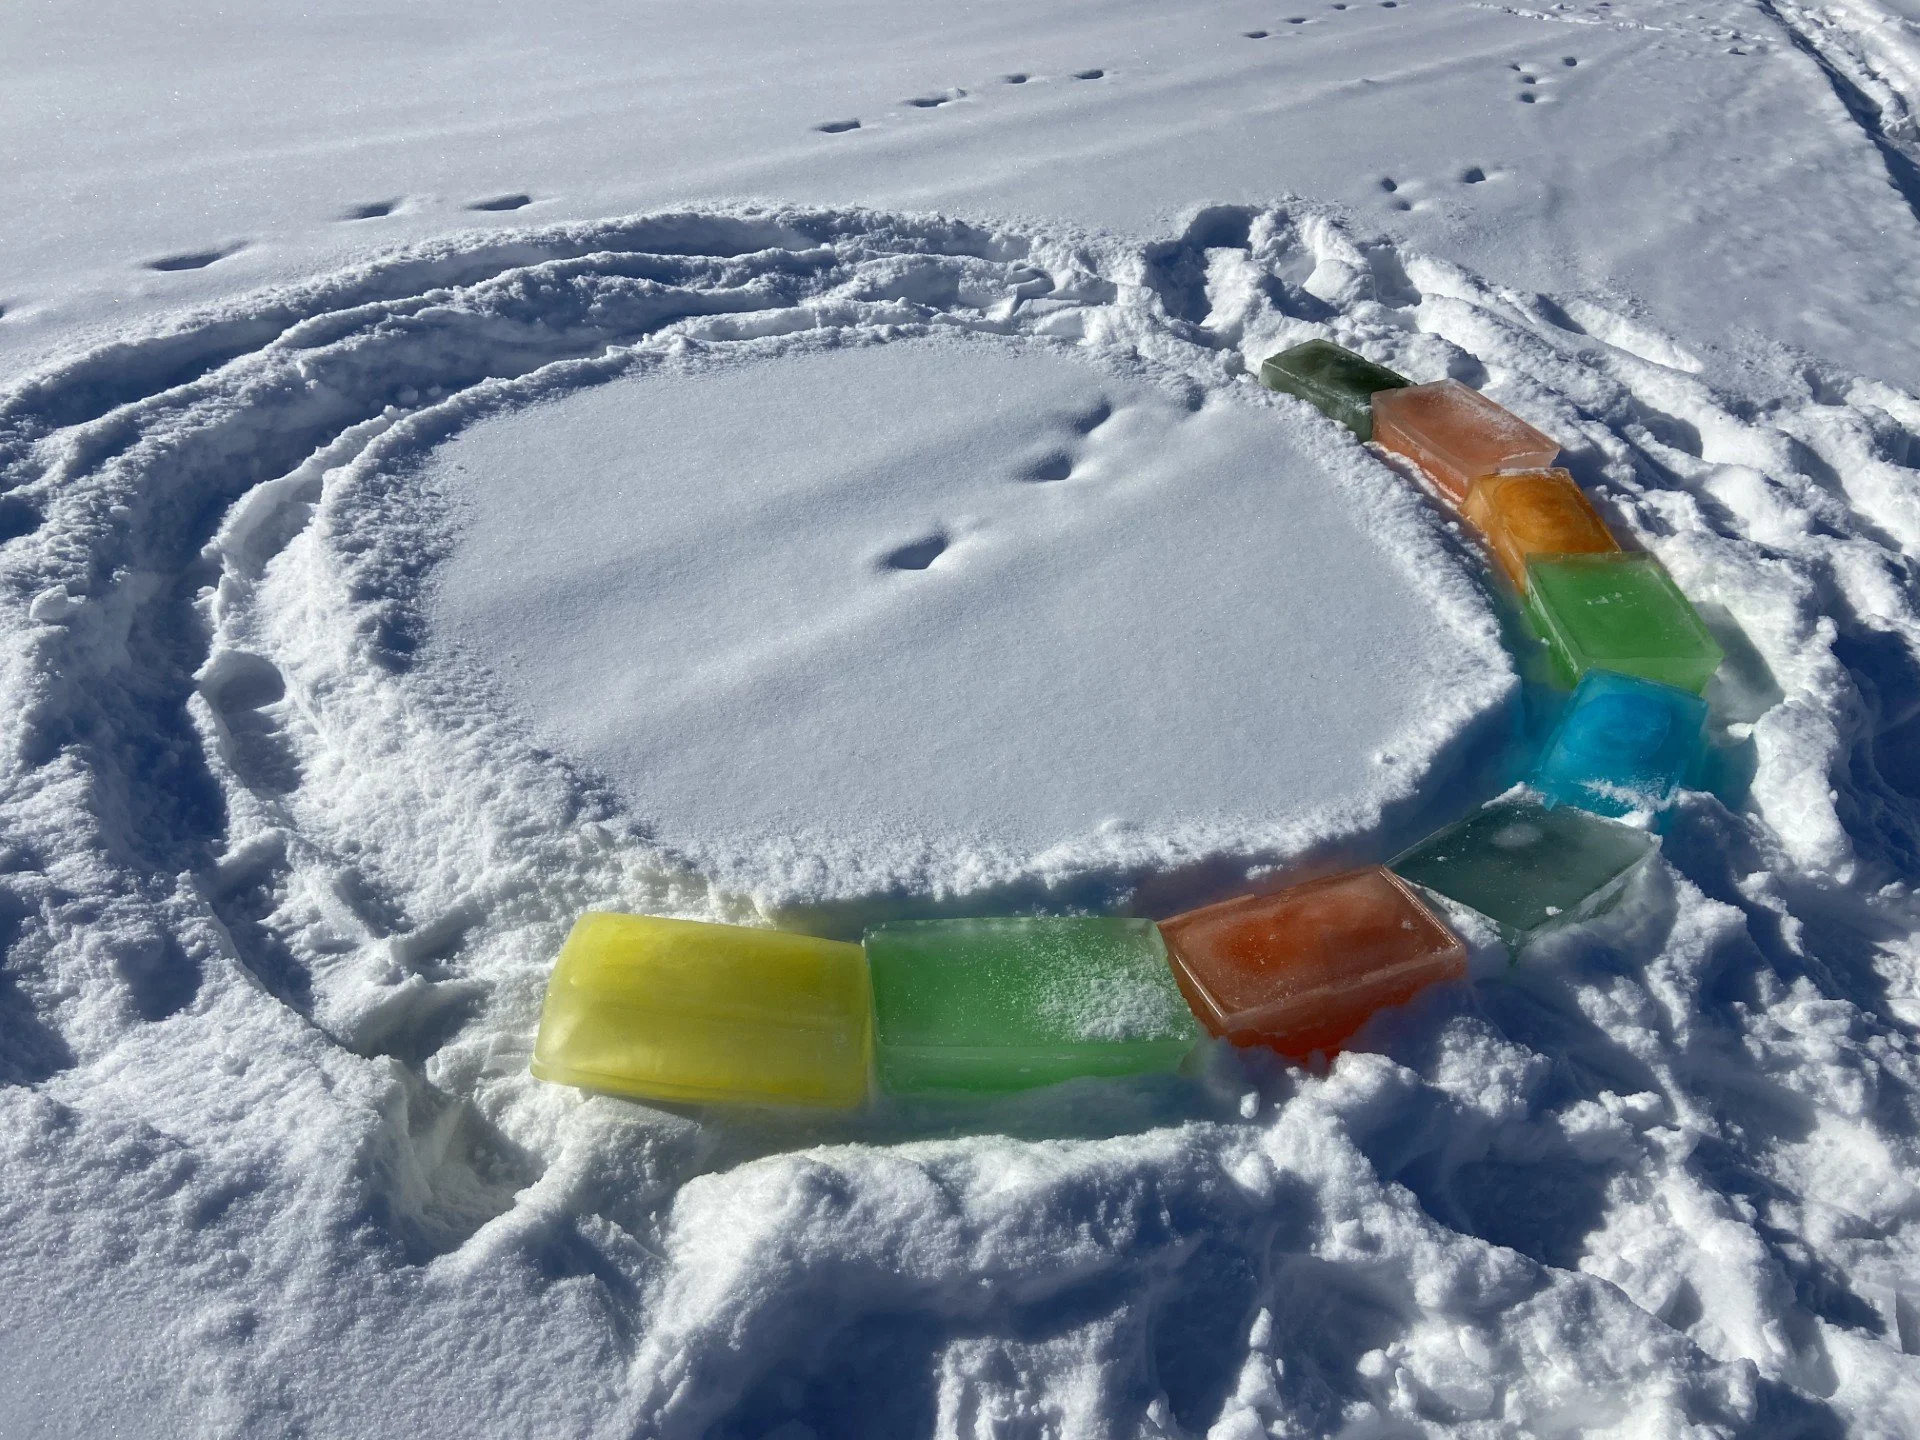
Build a Solid Base First -Pack snow smooth and draw out a large circle on the ground before stacking upward. A strong base keeps the igloo from collapsing later.
Start with Packable Snow
Snow should stick together when squeezed. If it’s too powdery, lightly mist it with water to help it hold.Snow insulates-don’t place the tins/ bins of water on snow
Place igloo blocks where wind can blow over them to help cool
Mix the color beforehand thoroughly or the color will sit in the middle. Use a regular plastic watering container: 20 drops of coloring.
Create a slush mixture: Fill a big container with water and add a bunch of snow to it to make a slush mixture and use that as the glue to stick them together! In negative temps it freezes the bricks together fast! Use Large 5 Gallon Bucket for big batches.
Utilize aluminum cake pans or if you plan to reuse them like we did, shoe size box containers, but any container should work. You need a lot, like hundreds of bricks, generally built over days.
Warning -Food coloring will get onto your hands or clothing.
Add Color as You Build
Mix food coloring in batches and pour in large 2 gallon watering can.Layer Colors for a Cool Effect
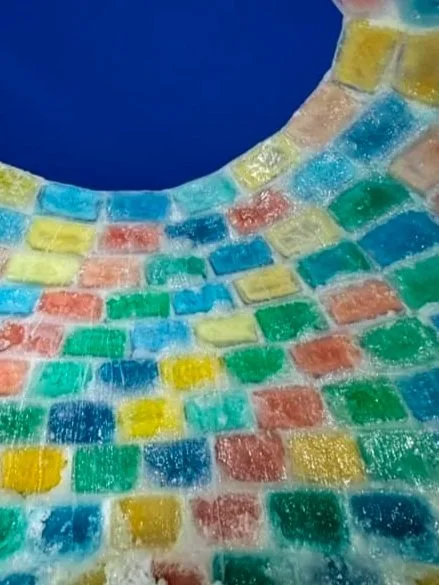
Alternate colors by level or section to create a rainbow, ombré, or stained-glass look.Angle Blocks Inward
Each layer should tilt slightly toward the center. This helps form the classic igloo dome and adds strength. Around the 3rd row start angling blocks at 3-5 degree angle as you stack upward.Leave space for door and Carve door last.
Shape a small entrance once the igloo feels sturdy. Keep it low to help trap warmth inside.
Simple Directions: How to Make a Colored Snow Igloo


Directions for Making a Colored Snow Igloo
Make the slush
In a bucket, mix clean snow with a little water until it becomes thick and slushy-this will be your mortar.Fill the molds with premixed colored water ( More will make brighter colors)
Allow time to freeze outside (if single digit temperatures or below plan for 24 hours to freeze) (10-20 degrees- plan for 48hours to freeze)
Flip & Release
Turn the molds upside down onto the ground and gently lift off. Repeat to make several batches of snow blocks.Start Your Base
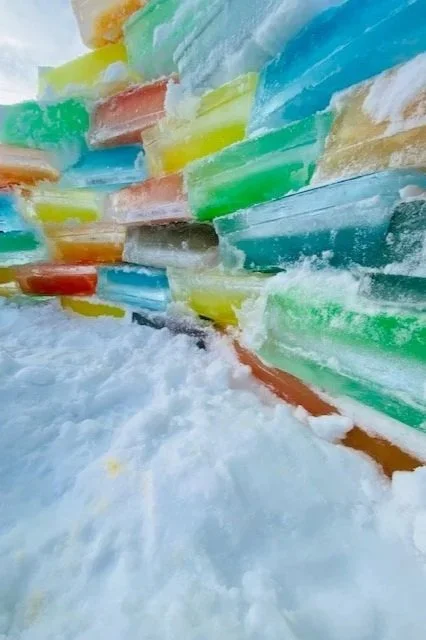
Arrange them in a circle, leaving a small opening for the door.Stack Upward
Add more colored snow blocks, angling each layer slightly inward to form a dome. Stack them on end to be taller and seal with slush.After the 3rd row start angling blocks at 3-5 degree angle as you stack upward.
Seal with Slush
Use plain slush as “snow cement” to fill gaps between blocks.Let It Set
Depending on outdoor temperatures, will factor into how fast you can build each layer. Wait 5- 10minutes in freezing temps so the igloo firms up before adding more layers.Carve the Door Last
Once sturdy, gently carve out the entrance with a spoon or small shovel.
Colored Igloo Wall
Closing Thoughts
A colored snow igloo is more than just a winter project—it’s a chance to slow down, laugh, and make memories outside, even on the coldest days. Whether you keep it simple or go all-out with rainbow walls and glowing lights, the best part is creating something together. Bundle up as you enjoy adding a little extra color to your winter days. Follow Discovering Anew for more winter activities and adventures.
Featured Posts You May Enjoy

Honest recommendations for winter essential snow gear for kids from a mother of four children.